How to update an event website after a postponement
A postponement leaves visitors with one urgent question: what should I do now? Keep the existing event page as the authoritative answer. Publish an approved status even when the new date is unknown, separate confirmed facts from pending decisions, and give ticket holders a real contact or next-update path. Then reconcile the website, ticketing system and attendee messages.
Boletolibre editorial team
Published
Put an unambiguous status at the top
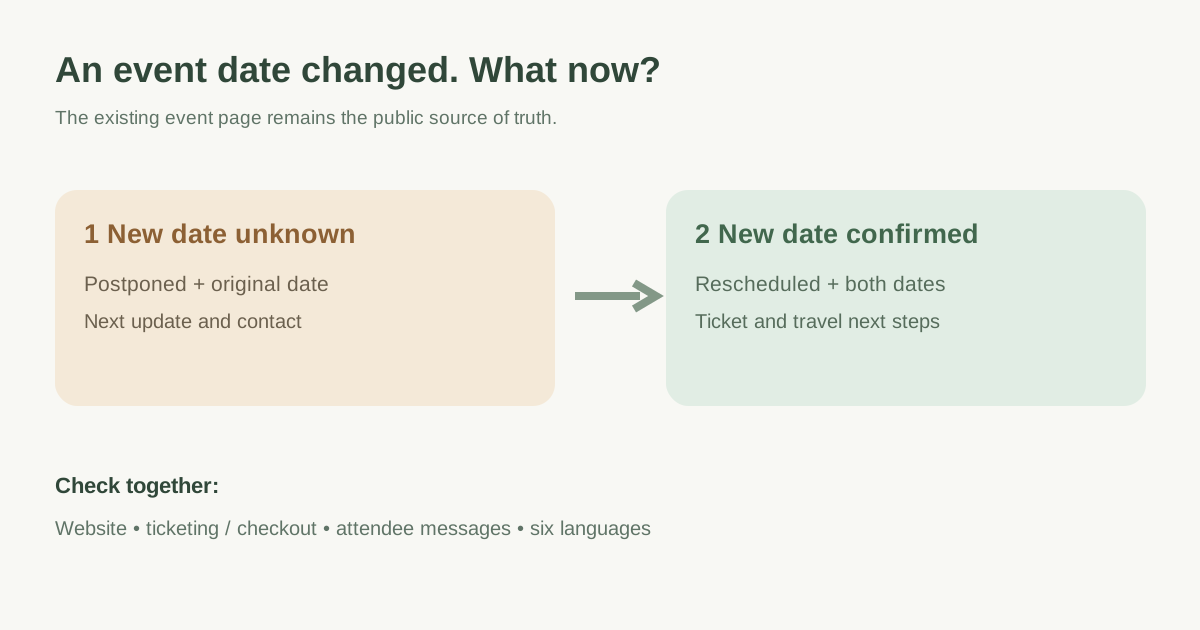
Use “Postponed — new date not yet confirmed” while the date is unknown. State the event name, original date and time zone, when the notice was updated, which details remain valid, and the next update channel or time that your team can actually honor. Once a new date is confirmed, replace the status with “Rescheduled” and show both old and new dates clearly. Do not present a placeholder ticketing date as the real new date.[1][3]
| Page state | What the visitor needs | What the team must confirm |
|---|---|---|
| Date unknown | Postponed; original date; next update and contact | Whether venue, tickets and registration remain valid |
| New date confirmed | Rescheduled; old and new date/time/time zone | Ticket transfer, venue and access details |
| Decision still pending | Explicitly pending answer and where to ask | Named owner and next review |
Give attendees a safe next action
Explain what an existing ticket holder should do, what a new visitor can do, and where a person with accessibility or travel needs can get help. State ticket validity, exchanges and refund options only after the organizer and ticketing provider have confirmed the applicable terms. If registration or sales are paused, replace “Buy now” with a truthful status and direct people to updates or support. Check the actual checkout link before leaving it in place.[3]
Keep the established event URL accessible instead of silently redirecting it to a new event. Review the homepage, schedule, venue, speaker pages, social previews and linked FAQs for contradictory dates. An announcement that appears only in a banner while the purchase card still shows the old date is not a complete update.[1]
Synchronize page, ticketing and direct messages
Assign one approver for the exact public wording, then update the event platform and site from that decision. An Eventbrite date edit does not itself replace attendee communication: its help guidance directs organizers to email registered attendees when they reschedule. Use the communication tools available in your provider, check the reply-to address and record when each audience was notified. Platform status, payment and refund behavior vary, so check the actual account configuration and policy.[3]
Update each translated page with the same status and confirmed facts. If a locale translation is still pending, use a visible, reviewed fallback rather than an old date that looks current. Recheck calendar attachments, confirmation emails and automated reminders; they can keep contradicting the page after its visible text is fixed.
Keep search-facing event facts in step
Google’s Event structured-data guidance distinguishes an unknown new date from a confirmed reschedule. For `EventPostponed` with no new date, retain the original `startDate` in the markup and change `eventStatus`; once the new date is known, use `EventRescheduled` with the new start/end dates and, if useful, `previousStartDate`. The visible page must explain the actual status plainly; the old date in markup is an identification convention, not an invitation to advertise that date as current. Review metadata and the live rendered markup after publishing. Markup never guarantees a particular search display.[2]
Keep the canonical event page and avoid creating a competing “new date” article as the only source of truth. A dated news update may help, but it should link to the maintained event page. Search results and cached previews can lag behind the site; direct attendee communication remains essential.[1][2]
Publish, inspect and maintain a change log
Open the public event URL on desktop and mobile, including all six language routes. Follow the registration or ticket path, check the date and time zone at each step, and inspect any sharing preview and search-facing markup. Log owner, publication time, approved facts, unresolved questions and the next review. Repeat the check when a new date, venue or ticket decision is approved.
Download the event postponement page-update worksheet (Markdown, English)
Sources and further reading
- How do you update your event website when plans change?LinkedIn · Accessed
- Event structured dataGoogle Search Central · Accessed
- Change your event’s date and timeEventbrite Help Center · Accessed