Create an event volunteer sign-up page: from shift request to confirmed assignment
A volunteer sign-up page should answer a practical question: can I help at this event, in this role, at this time, and what happens after I respond? It joins an approved role brief, real shift capacity, a public form and a staff decision. Write the page around that journey. In particular, decide whether the button submits an expression of interest, requests a particular shift or reserves an available slot immediately. Those are different promises.
Boletolibre editorial team
Published
1. Name the action before designing the page
Download the editable volunteer sign-up page, field and shift-intake worksheet (English Markdown)
Start with the operational state your team can support. An interest form says a coordinator will follow up; a shift-request form asks for a preferred role and time; an instant booking tool may reserve a slot if its capacity control and confirmation really work. Put that distinction beside the form and in its submit button. Do not call a request a confirmed assignment just because it has reached an inbox.
Identify one owner for role facts, one for shift capacity, one for the website and one for responses. Decide how quickly someone will review a request and how applicants can ask a question. Avoid a fixed reply deadline unless staffing and the tool can meet it.
Keep the volunteer path separate from attendee ticket purchase. A public event page may link to both, but the volunteer button should reach the actual volunteer form, and ticket checkout should remain the attendee route.
2. Publish a shift someone can actually evaluate
For each open role, state what the person will do, the event date, shift start and end with local time zone, check-in location or entrance, and whom they report to. Add confirmed support such as briefing time, breaks or equipment only when the operations owner has approved it. Link to the fuller role brief for boundaries and support rather than crowding the form.
Show whether a shift is open, full, under review or closed using the meaning those words have in your real workflow. If the form does not enforce slot capacity, do not display a supposedly live number. If you accept preferences and assign later, say so. If applicants may request more than one slot, explain whether those are alternatives or cumulative commitments; otherwise the coordinator may create collisions that the form cannot detect.
Keep approved public details apart from internal instructions. If arrival, accessibility or support questions need individual handling, provide a contact route and an owner instead of making a public first-step form collect sensitive explanations.
3. Choose a form and test its real behavior
A basic website form can collect interest, while a shift-signup service may also manage quotas, closures and reminders. In the worksheet, record the form URL, who can edit it, who receives a response, whether a shift can fill automatically and what happens if two people submit for the last opening. If capacity is manual, the page must describe a request rather than an immediate reservation.
An embedded form is still a separate system. Open the public page and its direct form link without organizer access, test the visible title and surrounding shift details, and see whether the embedded controls work on a phone and with a keyboard. Provide the direct link when an embed is unavailable.
For example, Google says a Google Form must be published before responders can use it and may be embedded on a website. Its ‘Limit to 1 response’ setting requires responders to sign in to a Google Account. That setting can conflict with a page promising an account-free route. The relevant answer is whatever your configured, published form does for an unauthenticated applicant; test that path before sharing the link.[5]
4. Ask only for information needed at this step
Map each proposed field to the decision it enables. An initial shift request commonly needs a name, a contact route, the desired role or time, and perhaps availability alternatives. A coordinator may need a short question about relevant experience for a particular task, but should be able to explain why. Do not use the first form as a catch-all for T-shirt size, emergency contacts, travel details or other later operational information. W3C's Forms Tutorial recommends simple, short forms that ask for what the process requires.[1]
Give every control a visible, specific label. Mark required fields and describe unusual time formats or multi-select behavior before someone makes an error. W3C explains that properly associated labels identify form controls for assistive technology and can increase the clickable area; placeholder text does not replace a label. [2][3]
Test an empty submission, an invalid contact value and a missing shift selection. The error should identify the field and tell the person how to correct it while preserving other answers where the tool permits. W3C's validation guidance explains why instructions and accessible error feedback matter. A technically successful form submission is only the beginning: check whether the response reaches the intended owner.[4]
5. Separate receipt, review and assignment
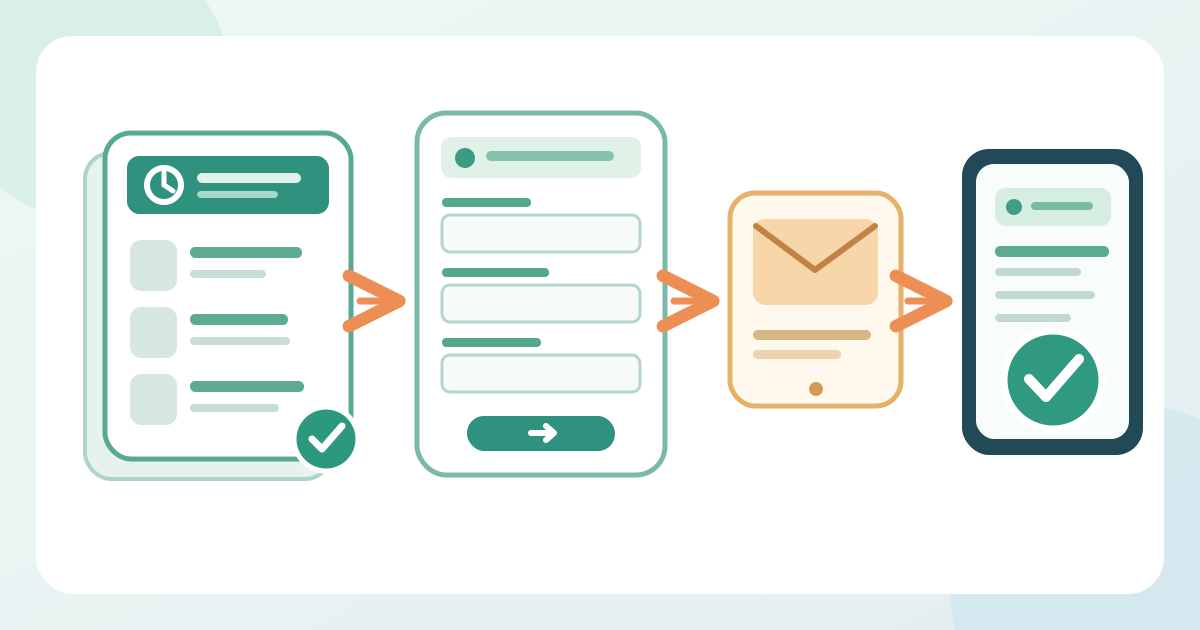
Write the response path before switching the form on. A submission may become ‘received,’ then ‘under review,’ then ‘assigned’ or ‘not available.’ Assign a coordinator to move each record through those states and reconcile duplicate or conflicting shift requests. If the tool merely emails a spreadsheet row, the coordinator must maintain the current roster elsewhere. The public page should never claim an automated queue, capacity lock or waitlist that the actual setup cannot support.
The first message should say what happened, not what the organizer hopes will happen. ‘We received your shift request and will review it’ is suitable for manual allocation; ‘You are assigned to [role], [date], [time], [arrival point]’ belongs after an assignment is recorded. If the tool sends a copy of the response, that copy is not necessarily an acceptance. Google documents options for response copies and cautions that delivery may not always occur as expected; test the mailbox and maintain a staff route for missing replies.[6]
Before confirming, compare the proposed shift with approved capacity and any other request from that person. Give the assignee an exact start, end, time zone, reporting place, contact route and next briefing step. If a shift is unavailable, send a clear alternative or closure note without exposing other applicants. Keep the page's public status synchronized with the roster so it does not continue inviting requests for a shift no one can place.
6. Publish the path and test it as a new volunteer
Put the sign-up link where an interested visitor will look: the event site's volunteer page, the recruitment flyer and any approved outreach message. Use one stable public page as the explanation, then one clearly labelled form action. A separate attendee registration button should not be visually mistaken for the volunteer action. On mobile, check the full role and shift facts above the form, the button label, the form's field order and the message shown after submission.
Run a complete test with a sample record that cannot be mistaken for a real applicant. Ask someone unfamiliar with the event to find a suitable shift, explain whether they are applying or booking, submit the test request and describe what happens next. Repeat with keyboard only, including the embedded form if used. Verify visible labels, error messages, the direct-link fallback and the staff inbox or response dashboard. Do not mark the page ready from an editor preview alone.
Then have the operations owner approve the final role, dates, capacity wording and contact route. Remove the test record using the team's normal process. The release check is complete when the public copy, form settings, response destination and assignment workflow describe the same reality, not when the page merely looks finished.
7. Maintain and close the page with the shift plan
During recruitment, set a review cadence for changed shift times, filled roles and new locations. Each change needs an approved source, an update to the public page or form, and an observed check by someone outside the editor account. If a session or event date moves, update both the role description and the response message. People who already received an assignment may need a separate direct update; changing the web page does not notify them.
When a role fills, close that option or clearly mark it as requests pending review according to the tool's actual behavior. When all shifts close, replace the invitation with a truthful closed message and a contact route if the team can handle late questions. Check that old flyer links still lead to a useful status rather than a form that silently accepts requests no one will read.
After the event, retire open sign-up controls and decide whether the page should thank volunteers, point to a future edition or simply close. Preserve operational records under the team's approved process, but do not leave a stale ‘sign up now’ path on a finished event.
Sources and further reading
- Forms TutorialW3C Web Accessibility Initiative · Accessed
- Labeling ControlsW3C Web Accessibility Initiative · Accessed
- Form InstructionsW3C Web Accessibility Initiative · Accessed
- Validating InputW3C Web Accessibility Initiative · Accessed
- Publish & share your form with respondersGoogle Docs Editors Help · Accessed
- View & manage form responsesGoogle Docs Editors Help · Accessed