Event no-show rate: calculate it from valid tickets and check-ins
A sold ticket, a valid registration and a person who entered are three different counts. A useful no-show rate starts with a stated population and a verified arrival record. This guide gives the formula and a blank tally card; use the attendance reconciliation workbook first if ticket and gate exports disagree.
Boletolibre editorial team
Published
Choose one eligible population and cutoff
Download the no-show numerator and denominator card (Markdown, English)
Choose a specific event date or session and a reporting cutoff. Count individual eligible tickets or confirmed places, not orders: one group order can cover several people. Remove canceled, refunded, voided and superseded transfer records according to the status at the cutoff; reconcile replacements so one transferred entitlement is not counted twice. Say whether guest-list and complimentary places are included. Eventbrite separates order statuses from attendee statuses, so do not infer eligibility from payment totals alone.[3]
Count distinct admissions, not scan attempts
Use a check-in export for the same date or session and count each admitted person or valid ticket once. A rejected scan, a validation-only scan or a repeated entry is not another arrival. Include approved manual/door admissions when they belong to the chosen population; record late door sales separately if they were never in the pre-event denominator. Eventbrite notes that its scan setting can validate a ticket without checking a person in. Investigate offline sync, re-entry and missing gate data before treating an unscanned ticket as a no-show.[2][4]
Calculate and show both numbers
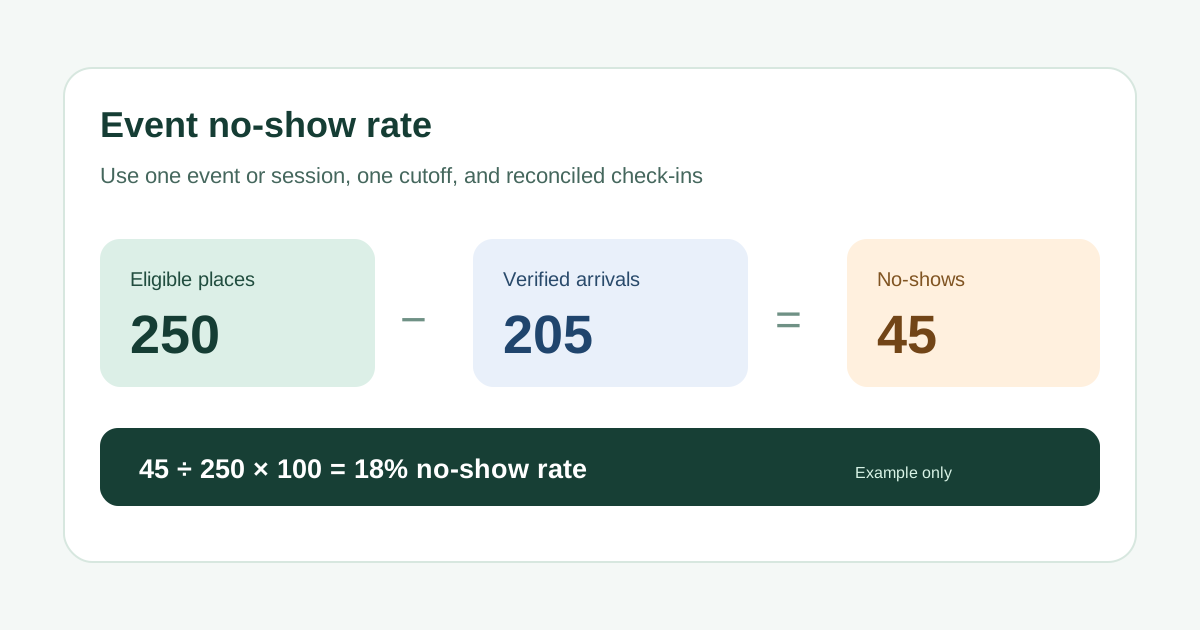
No-shows = eligible places − eligible places with verified admission. No-show rate = no-shows ÷ eligible places × 100. For example, after removing cancellations and duplicate transfers, 250 places are eligible and 205 have a verified admission: 45 no-shows, or 18%. Report all three counts, the cutoff and the admission evidence beside the percentage. If the denominator is zero, show “not applicable,” not 0%. The first organic Google result uses the same complement of attendance rate; the meaningful difference lies in who belongs in each count.[1]
Segment only when the comparison helps
You may report paid, free, speaker or session types separately, but apply a consistent eligibility rule within each. Small segments can move sharply when one person arrives; show raw counts. Never compare an RSVP to a paid ticket without naming the different commitments. For recurring editions, preserve the same cutoff and definitions or flag the difference. A virtual join or session scan needs its own attendance definition and should not be mixed into an in-person door rate.
Use the result without inventing capacity
Use your own history to ask whether reminders, timing or access information need review. The observed rate is not proof of why someone stayed away and is not a universal forecast for the next event. Do not sell beyond approved capacity or promise a waiting-list place because you expect no-shows. Have the gate lead approve corrections and retain only the data needed for the analysis under the event’s access and retention rules.
Sources and further reading
- In-Person Event Attendance Rate: Calculate, Benchmark, ForecastEventIQ · Accessed
- Check in attendees at your event with the Eventbrite app for organizersEventbrite Help Centre · Accessed
- Glossary of order and attendee statuses in event reportsEventbrite Help Center · Accessed
- Download your Check-ins reportEventbrite Help Center · Accessed