The event registration funnel: from discovery to check-in
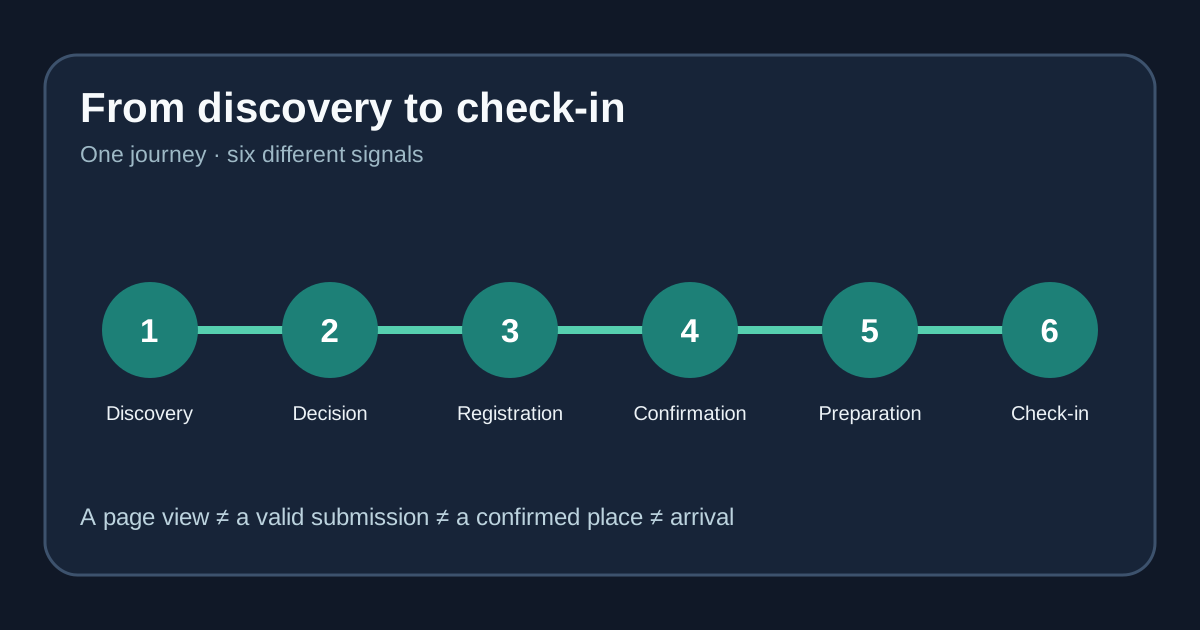
An event registration funnel is the sequence a person follows from discovering an event to arriving with a valid place. The useful question is not simply how many people clicked “Register.” It is where a person could lose the information, confidence or confirmation needed to continue. Map the whole journey once, then improve the specific handoff that is failing.
Boletolibre editorial team
Published
Discovery and interest: make the next step clear
Start with the channels that actually point to the event: search, email, social posts, partner links and direct sharing. Put the date, place, access information, price or free status and official registration route where a visitor can find them. A page view shows interest in the information, not an intent to buy. If you publish on Boletolibre.com, make the event page a consistent reference for the current details and approved registration link.
Check the route on a phone and with a keyboard. A visitor should know what happens after the call to action, especially when it opens another domain. Track the source only when you have a reliable tagged link or platform record; “direct” traffic does not reveal the person’s original discovery channel.
Consideration: answer the decision questions
Before someone commits, they may need the schedule, total ticket price, eligibility, refund terms, accessibility information or travel details. List the questions your audience actually asks and answer them on the event page or in a clearly linked policy. Avoid artificial urgency or implying that an undecided visitor is a failed conversion.
Record the event-page URL and the destination of every registration button. Test the same route from email and partner posts. An unclear change of website or price at this point can look like a broken or unsafe journey, even when the checkout itself works.
Registration: remove avoidable form friction
Distinguish a button click, form start, valid submission and accepted registration. They are separate observations. Ask for the information needed to deliver this event; mark required fields, explain formats and return useful errors without erasing entered answers. The W3C WAI forms tutorial recommends labels, instructions and accessible validation rather than relying on placeholder text alone.[3]
For a free RSVP, the accepted registration may be the commitment. For a paid event, a submitted form may still lead to payment review or failure. Follow one controlled example through each branch, including a declined or interrupted payment, and write down the message the attendee actually sees.
Payment and confirmation: define a completed place
Define the authoritative completion signal before drawing the funnel: accepted RSVP, successful payment and issued ticket may occur at different moments. Google Analytics recommends event names such as begin_checkout and purchase, but those names do not mean your site or a hosted payment page collects them automatically. Reconcile analytics with the registration and payment systems before claiming a confirmed sale.[1]
After completion, give a clear confirmation with event identity, date, venue or joining link, ticket or reference retrieval, and a support route. A thank-you page is useful feedback, but a page load alone does not prove settlement or a valid entitlement. State what happens while an order is pending and who can correct a missing confirmation.
Before the event: help confirmed people arrive
A confirmed attendee still needs accurate access details. Review the schedule, arrival window, accessible entrance, transport information and any materials they must bring. Send necessary operational updates through channels the attendee can actually receive; distinguish these from optional marketing messages. Keep the event page aligned with messages when details change.
Choose one observable pre-event check, such as confirmation delivery or a support issue that was resolved. Email opens are an unreliable substitute for readiness, and no universal number of reminders suits every event. The objective is a person who can locate the current facts and ask for help.
At the door: compare intent with attendance
Attendance is a separate result from registration. At check-in, use the current admission record and the event’s approved exception route for missing names, changed tickets or offline devices. Record actual arrivals and unresolved exceptions. Do not call every unscanned registrant a no-show until delayed scans, alternate gates and manual admissions are reconciled.
Look at the journey by ticket type or audience where the data is trustworthy, while protecting personal information. A large gap between confirmed places and arrivals points to a different problem from a gap between form starts and accepted registrations. The next action and owner should match the handoff, not a generic “improve conversion” target.
Use the stage map to decide what to change
Copy the stage map and fill one row per handoff: attendee question, official page or system, observable signal, likely failure, owner and one change to verify. Choose a comparison window and keep definitions stable. In GA4, open and closed funnel explorations have different entry rules, so record the setting before comparing counts across reports.[2]
Review a real path on mobile and desktop, including a free and a paid branch if both exist. Decide which gap is actionable, make one change, and check the relevant signal again. If the checkout is on a separate provider, document the measurement boundary instead of fabricating a continuous funnel.
Download the event registration stage map (Markdown, English)
Sources and further reading
- [GA4] Recommended eventsGoogle Analytics Help · Accessed
- [GA4] Funnel explorationGoogle Analytics Help · Accessed
- Forms TutorialW3C Web Accessibility Initiative · Accessed