Payment links vs event ticketing software: which workflow do you need?
A payment link can collect money quickly, while event ticketing software normally connects a sale to a ticket and an admission workflow. The important question is not which button looks simpler. It is what happens after a successful payment: who creates a valid place at the event, tells the attendee how to enter and gives staff a trustworthy record at the door? The leading organic comparison separates digital payments from digital ticketing. Use that distinction to map your own handoffs rather than assuming every vendor includes the same features.
Boletolibre editorial team
Published
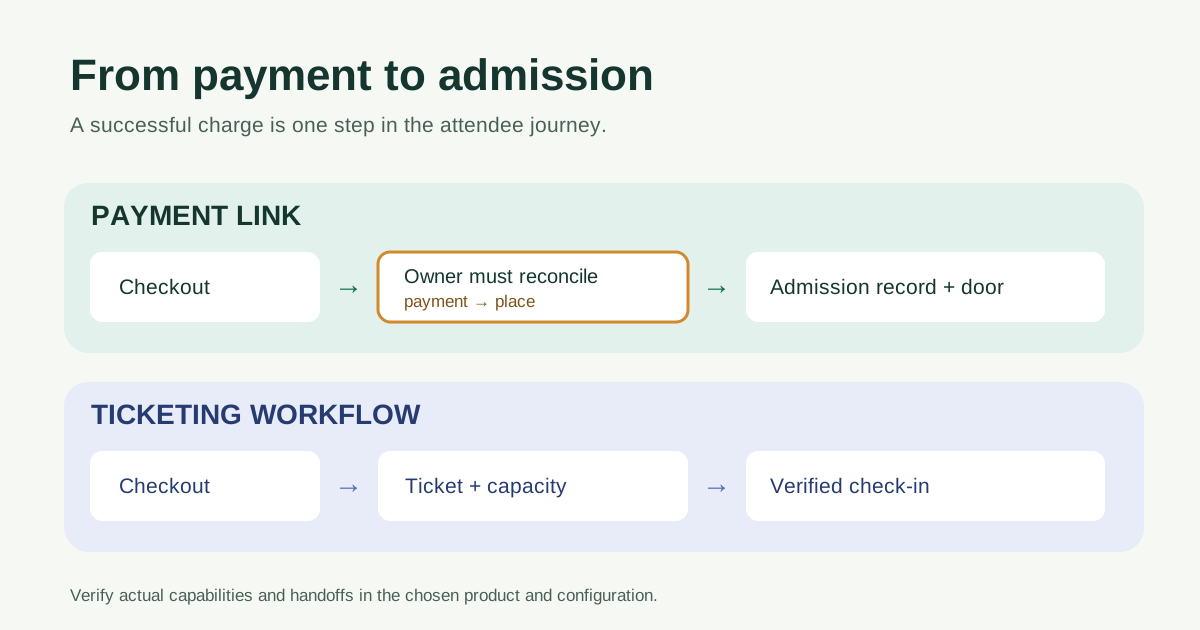
Payment confirmation is not the same as admission entitlement
Stripe describes a Payment Link as a reusable shareable URL to a hosted payment page. A new checkout session opens for each customer; payment events can be used to track completed transactions. That proves money moved through checkout, but a bare payment link does not by itself define a seat, ticket identity, door rule or scanned admission record. Those steps need a connected registration or ticket system, an integration, or a documented manual process. Stripe supports configurable fields and post-payment flows, so examine the actual setup before deciding what is missing.[2][3]
By contrast, Eventbrite documents paid and free ticket types, quantity and capacity settings, and an Organizer check-in app that scans ticket QR codes or searches attendees. These are verified examples of one ticketing product, not promises that every hosted ticketing service offers the same controls or that every feature is available in every market.[4][5]
| Job to complete | Payment link alone | Ticketing workflow to verify |
|---|---|---|
| Take payment | Hosted checkout and transaction record | Checkout associated with a ticket order |
| Reserve a place | Requires a separate allocation rule | Ticket quantity, capacity or inventory rule |
| Identify admission holder | Collect and reconcile needed attendee fields | Buyer and attendee records linked to ticket |
| Prove right of entry | Separate pass, list or manual verification | Ticket or admission credential and check-in record |
| Handle a change | Coordinate payment and admission records | Confirm refund, transfer and cancellation behavior |
Choose by operational complexity, not checkout speed alone
A payment link plus a carefully kept list may be enough for a small, controlled event with no assigned seats, no resale or transfers, simple capacity and a team able to reconcile every payment before opening doors. Write down who verifies the payer, who creates the attendee record and what happens when the payment succeeds but the last place has already been allocated. Do not promise entry in the payment receipt until that handoff is reliable.
Use a ticketing workflow when you need live inventory, multiple admission types, timed entry, many door staff, scanning, transfers or a clear audit of admitted people. Confirm each requirement in the chosen provider’s current product and plan. The presence of a checkout page is not proof that those operations are covered. This article compares architecture; the existing platform comparison and fee guide cover vendor selection and cost.
- Low-volume invite-only dinner: a payment link may work if the organizer manually assigns and confirms each place.
- General-admission festival: connect payment to capacity, ticket issuance and reliable check-in.
- Assigned seating or timed entry: verify seat or slot inventory and change handling before launch.
Download the payment-to-admission handoff worksheet
Use the editable worksheet to record one owner and one proof for each step: sale, completed payment, capacity reservation, attendee identity, credential delivery, refund or cancellation, and door check. Mark any step that depends on manual export or copying between systems. A test purchase should move through every step, including a failed or refunded payment and a duplicate name at the door.
Download the payment-to-admission handoff worksheet (Markdown)
A confirmation email or payment receipt can be useful evidence, but it is only an admission credential if your event explicitly defines and verifies it as one. Keep a unique reference and a reconciliation method; do not rely on a screenshot of payment without checking the underlying transaction and admission record.
Run a small end-to-end trial before publishing the link
Make a test purchase, confirm the event record is created or manually approved, receive the promised instructions, and try the check-in method. Then test a duplicate link use, a refund, a name change, a sold-out condition and a payment that is pending or fails. Write down which system is the source of truth for admission at each step. If two systems disagree, decide who can resolve the case and how staff see that decision.
Do not compare transaction fees as a proxy for total operating cost. Manual reconciliation, support and door delays are part of the workflow decision. Get the current provider terms and a demo for the specific market and configuration you will use; capabilities and commercial terms can change.
Sources and further reading
- Understanding the Differences Between Digital Ticketing and Digital PaymentsHomeTown Ticketing · Accessed
- Stripe Payment LinksStripe · Accessed
- Payment Link API referenceStripe Docs · Accessed
- Create and edit ticket typesEventbrite Help Centre · Accessed
- Check in attendees at your eventEventbrite Help Centre · Accessed